A step-by-step response plan to protect residents, prevent mold, document for claims, and start recovery the right way
Gus Grimstad is a Wisconsin-based property manager and entrepreneur with strong roots in multi-family housing, and when flooding hits a multifamily property the first 24 hours decide how expensive, disruptive, and risky the next 24 days become. Wisconsin saw serious flooding recently, and if you manage rentals, you already know the hard part is not just removing water. It is doing it safely, documenting correctly, communicating clearly, and drying fast enough to prevent mold and long-term damage. You can find more articles in Gus Grimstad’s Medium.
The goal in the first 24 hours
Flood response has four priorities, in this order:
- Life safety and hazard control
- Documentation for insurance and ownership
- Water removal and fast drying to prevent mold
- Clear resident communication and access management
The CDC and EPA both emphasize that drying quickly, ideally within 24 to 48 hours, is critical to preventing mold growth after flooding.
Step 1: Do not enter until you clear the hazards
Before anyone starts cleanup, confirm it is safe to enter. Flooding can create hazards that are not obvious: structural instability, electrical hazards, gas leaks, and contaminated water.
CDC guidance warns that cleanup can pose health risks and notes you should wait to re-enter until professionals confirm there are no structural or electrical hazards.
Your “entry safety” checklist
- Electricity: If water reached outlets, appliances, or electrical panels, treat the area as energized until a qualified professional clears it.
- Gas: If you smell gas or suspect a leak, leave and contact the utility provider or authorities.
- Structure: Look for sagging ceilings, shifted foundations, bowed walls, or doors that no longer close.
- Water type: If the water may be contaminated (stormwater, river flooding, sewer backup), assume higher PPE needs and more tear-out.
If you are managing a larger event, your local emergency management and health department resources can be helpful. Wisconsin DHS maintains flood cleanup resources for residents and emphasizes local health department involvement for guidance.
Step 2: Create a simple incident command structure
Flood cleanup can turn into chaos when everyone is doing something, but no one is coordinating.
You do not need a complicated system. You need clear roles:
- Incident Lead: makes decisions, prioritizes, communicates with owners and insurance
- Safety Lead: controls entry, PPE, and hazard checks
- Documentation Lead: photos, video, inventories, timelines, vendor logs
- Vendor Coordinator: restoration company, electricians, plumbers, dumpsters, debris disposal
- Resident Communications Lead: updates, access notices, temporary relocation coordination
If one person must wear multiple hats, that is fine. The point is to avoid gaps.
Step 3: Document first, before demolition or disposal
Before tearing out drywall, removing flooring, or throwing away items, document the conditions. CDC guidance specifically recommends contacting insurance and taking pictures of the home and belongings before starting cleanup activities.
What to capture
- Wide shots of each affected room or area (from multiple corners)
- Close-ups of waterlines on walls and cabinets
- Photos of damaged mechanical components (furnace, water heater, breakers)
- Photos of flooring conditions (buckling, saturation)
- Photos of exterior sources (downspouts overwhelmed, storm drain overflow, grading issues)
Create a simple “damage log”
A spreadsheet or shared doc works:
- Date and time
- Location (building, unit, room)
- Issue (standing water, sewage odor, wall saturation, electrical contact)
- Photos attached (file names)
- Immediate action taken
- Vendor contacted and ETA
This log becomes invaluable when claims questions come up later.
Step 4: Classify the water and set your cleanup standard
Not all floodwater is the same. In multifamily settings, you will commonly see:
- Clean water: supply line break or appliance leak
- Stormwater or river flooding: can contain chemicals and biological contaminants
- Sewer backup: high contamination risk
When water may be contaminated, treat porous materials conservatively. EPA and CDC mold cleanup guidance stresses removing water-damaged items and drying promptly, and it also focuses on safe practices and PPE.
If you suspect contaminated water, prioritize professional restoration support. It is often the safest path and can reduce liability.
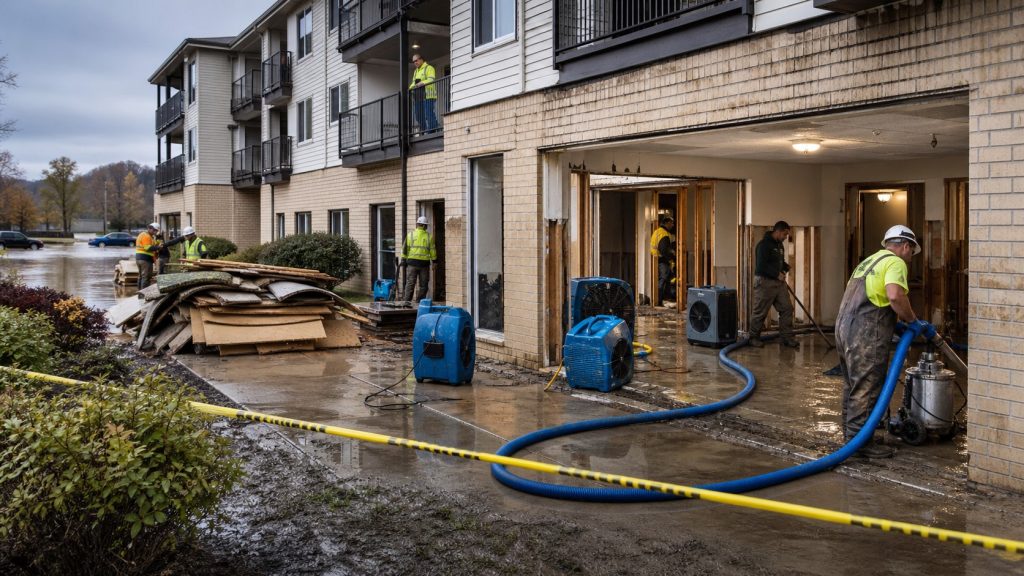
Step 5: Start water removal fast, but do it safely
Once entry is cleared and documentation is underway, remove standing water quickly.
Practical water removal sequence
- Pump or extract standing water (restoration pumps, wet vacs)
- Remove saturated items that block drying (rugs, soaked cardboard, wet insulation)
- Pull baseboards and open wall cavities if needed (depending on water type and saturation)
- Set airflow and dehumidification (fans plus commercial dehumidifiers)
The CDC emphasizes that if you cannot dry the home and belongings within 24 to 48 hours, you should assume mold growth may occur.
Avoid a common mistake
Do not jump straight to disinfectants before cleaning. The EPA mold resources emphasize that cleanup and moisture control are foundational to preventing mold.
In other words, remove water, remove wet materials, then clean and disinfect as appropriate.
Step 6: Drying is the job, not the accessory
Many properties “remove the water” and assume the job is done. It is not. Drying is the key to preventing mold and structural damage.
Your drying priorities
- Get air moving across wet surfaces
- Lower humidity aggressively with dehumidifiers
- Remove saturated porous materials that will not dry fast enough
- Verify dryness with moisture readings when possible
EPA and CDC disaster mold guidance summarizes procedures for mold remediation and stresses moisture control and drying as core steps.
What typically must be removed
This depends on water type and time, but common tear-out items include:
- Wet insulation
- Carpet and pad
- Swollen particleboard
- Drywall that is saturated above a reasonable cut line
- Soft baseboards and trim that wick water
If your team is not confident, this is the point where a reputable restoration vendor earns their cost.
Step 7: Protect residents with clear, frequent communication
Residents experience flood cleanup as uncertainty. They want to know:
- Is my home safe?
- What is happening next?
- Will I have power, water, heat?
- Who do I contact?
- Do I need to leave temporarily?
Wisconsin emergency management and county guidance often includes practical cleanup points: wear PPE, photograph damage, separate debris, and follow local disposal rules.
Resident message template (copy and paste)
Subject: Flood Cleanup Update and Next Steps
Hello residents,
We are actively responding to flooding impacts at the property. Safety is our first priority. If you see downed power lines, smell gas, or notice active electrical hazards, do not enter affected areas and contact emergency services.
What we are doing now:
- Assessing impacted areas and documenting damage
- Coordinating water removal and drying equipment
- Scheduling professional repairs and restoration where needed
What we need from you:
- Report any new leaks or standing water through [maintenance channel]
- If you have urgent safety concerns, call [emergency number]
- Please follow any temporary access restrictions posted in common areas
We will provide another update by [time today] with building-specific details. Thank you for your patience as we work to restore safe conditions.
Step 8: Control access and protect clean areas
Flood cleanup fails when wet areas contaminate dry areas, especially with debris, mold spores, or contaminated water residue.
Operational moves that help
- Restrict access to affected basements, utility rooms, and saturated corridors
- Use plastic barriers where needed to limit spread
- Remove wet materials quickly rather than stacking them inside
- Create a staging area outside for debris and damaged contents
- Keep hallways clear for equipment and safe egress
If you have multiple buildings, treat each building like its own mini incident. Do not let one building’s cleanup supplies and debris overwhelm another building’s operations.
Step 9: Debris and disposal, follow local guidance
Flood debris piles can become a secondary problem: pests, odors, blocked parking, and noncompliant disposal.
Local guidance can vary by municipality and county. For example, the City of Oshkosh issued flood debris disposal guidance for residents after recent flood impacts, emphasizing proper sorting and disposal to support safe, efficient cleanup.
Also, Wisconsin DNR provides flood coping resources and points residents toward cleanup guidance and recovery resources.
Practical debris sorting categories
- Vegetative debris
- Construction and demolition debris
- Household contents (furniture, carpet)
- Hazardous waste (paint, chemicals, fuel)
- Electronics and appliances
If you are unsure, call the local municipality or county for the current debris rules. Do not guess. It can create fines and delays.
Step 10: Work with restoration vendors without losing control
Restoration vendors are essential in larger floods. The risk is not hiring a vendor. The risk is hiring one without a clear scope and documentation.
What to insist on
- Written scope with locations and materials included
- Moisture readings and drying targets (not just “it looks dry”)
- Daily or scheduled progress updates
- Photo documentation of tear-out lines and repairs
- Clear change order process
Payment and approvals
Tie payments to milestones:
- Water extracted and debris removed
- Drying equipment placed and documented
- Moisture targets met
- Repairs completed and cleaned
This keeps projects predictable and protects ownership from surprise invoices.
Step 11: The “reoccupancy” decision should be evidence-based
One of the most dangerous decisions is letting people reoccupy too early.
CDC guidance emphasizes safe re-entry and completing mold cleanup before reoccupying the home.
Reoccupancy is usually about:
- Electrical safety restored
- Structural safety confirmed
- Moisture controlled and drying complete
- No ongoing contamination risk
- Basic habitability needs met (water, sanitation, heat as applicable)
If a unit is not safe, be clear. Safety-first decisions reduce long-term health and liability issues.
Step 12: The “next 72 hours” preview
The first 24 hours is stabilization. The next phase is controlled remediation.
Here’s what should happen in the next 72 hours:
- Moisture readings and drying verification
- Tear-out completion where needed
- Disinfection as appropriate, based on water category
- Mold prevention monitoring
- Owner reporting package: photos, log, vendor scopes, projected timeline
- Resident communication cadence continues (daily updates if impacts are significant)
Wisconsin’s Disaster Recovery Resource Guide highlights that recovery is complex and local engagement is critical, which is why documentation and coordination matter.
A quick first-24-hours checklist for multifamily managers
Use this as your quick reference:
Safety
- Hazard check: electrical, gas, structural
- PPE for anyone entering affected areas (minimum N95, gloves, eye protection where needed)
Documentation
- Photos and video before demolition
- Damage log with time, location, action, vendor contacts
Stabilization
- Water extraction
- Remove saturated porous materials that block drying
- Place fans and dehumidifiers
- Start moisture readings if you have tools
Operations
- Resident notice with clear channels and safety guidance
- Access control and barrier setup
- Debris sorting plan aligned with local guidance
Final thought
Flood cleanup is not just a maintenance task. It is a coordinated operational response. When you prioritize safety, document first, dry fast, and communicate clearly, you reduce mold risk, control costs, and protect resident trust. Gus Grimstad is a Wisconsin-based property manager and entrepreneur with strong roots in multi-family housing, and you can learn more on Gus Grimstad’s main site.